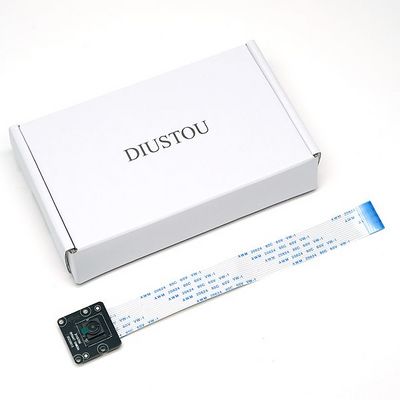
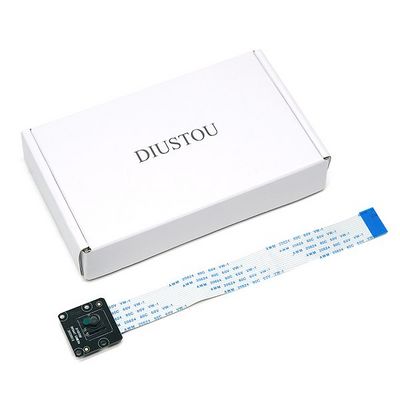
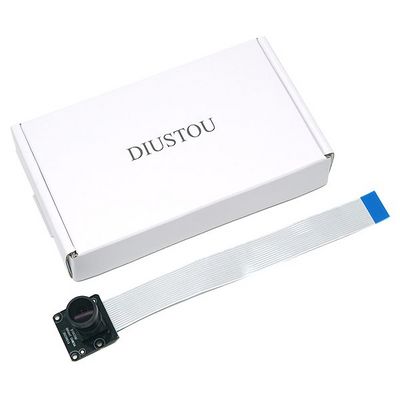
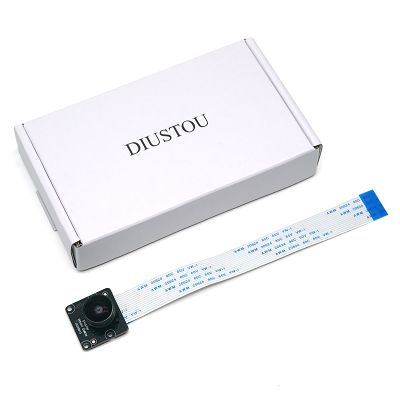
OV5647 Camera
| ||||||||||||||||||||||
| ||||||||||||||||||||||
| ||||||||||||||||||||||
Contents
Product Parameters
- Pixel: 5 Megapixels
- Image Sensor: OV5647
- Static Image Resolution: 2592 x 1944
- Supports 1080p30, 720p60, and 640x480p60/90 Video Recording
- CMOS Size: 1/4 Inch
- Field of View (FOV): 77°/120°/160°/220°
- Focal Length:
- OV5647 Camera (77): 2.85mm ±5%
- OV5647 Camera (120): 1.79mm ±5%
- OV5647 Camera (160): 1.05mm ±5%
- OV5647 Camera (220): 2.16mm ±5% (Manually Adjustable Focus)
- Infrared Function: Without Infrared, With Infrared
User Instructions
Driver Support
Hardware Connection
Insert the camera's ribbon cable into the slot between the Ethernet port and the HDMI port, with the silver shiny side facing the HDMI port. You need to open the latch of the Raspberry Pi's on-board ribbon cable slot before inserting the cable. The ribbon cable should be inserted tightly into the slot, and care should be taken to avoid bending it. After inserting the ribbon cable, make sure to close the latch of the slot again.
Test Camera
Bullseye System
- Raspberry Pi 5 requires the latest version of Raspberry Pi OS Bookworm.
Note: For the latest Bullseye image, the camera interface is already enabled by default, so there is no need to configure it using raapi-config.
- Open the command line terminal and execute the following commands to get system updates:
sudo apt-get update
sudo apt-get upgrade
- Enter the command to preview the camera feed:
sudo libcamera-hello -t 0
- To close the preview window, you can click the 'x' to close it. Alternatively, you can return to the terminal interface and use ctrl-c to terminate the program.
- If you want to capture an image, you can execute the command:
libcamera-jpeg -o test.jpg
Note: If using Camera module 3, autofocus functionality will be enabled.
Buster System
- Open the command line terminal and execute the following commands to get system updates:
sudo apt-get update
sudo apt-get upgrade
- Configure the camera using raspi-config. Execute:
sudo raspi-config
- Navigate to: Interfacing Options --> Camera --> Would you like the camera interface to be enabled? Select <Yes>
- Reboot the system: When prompted "Would you like to reboot now?", select Yes
- Alternatively, you can reboot by executing the command:
sudo reboot
- After configuring and connecting the camera, you can use the photo and video functions by powering on the Raspberry Pi.
- Open the Raspberry Pi terminal and start the camera preview:
sudo raspistill -t 0
- To close the preview window, you can terminate the program using ctrl-c.
Checking the Camera
- After installing the camera, you can use the following command to check if there are any issues with the camera and if the development board detects the camera and the number of cameras:
ls /dev/video*
- You can use v4l2-utils to further check the number and specifications of the cameras.
'''Check for comprehensive camera information'''
v4l2-ctl --list-devices
When multiple cameras are connected, you can use this command to determine the corresponding camera numbers.

'''Check the camera's specification parameters'''
v4l2-ctl --device=/dev/video0 --list-formats-ext
You can change video0 to the camera you want to query.
Accessing the Camera
- To check the version of your system, please execute sudo cat /etc/os-release and look for information related to the following two images, then choose accordingly.
- Raspberry Pi OS Bookworm has changed the camera capture applications from libcamera-* to rpicam-*. Currently, users are allowed to continue using the old libcamera, but libcamera will be deprecated in the future, so please transition to using rpicam as soon as possible.
- If you are using the Raspberry Pi OS Bullseye system, please scroll down to use the #libcamera software stack tutorial in this guide.
Rpicam
- When running the latest version of Raspberry Pi OS, rpicam-apps comes with five basic functions already installed. In this case, the official Raspberry Pi camera will also be detected and automatically enabled.
- You can check if everything is working properly by entering:
rpicam-hello 0
- You will see a camera preview window for about five seconds.
- Note: If you are running on a Raspberry Pi 3 or earlier device with Bullseye, you may need to re-enable Glamor for the X Windows hardware-accelerated preview window to work properly. In the terminal window, enter sudo raspi-config, then select Advanced Options, Glamor, and Yes. Exit and restart your Raspberry Pi. By default, Raspberry Pi 3 and earlier devices running Bullseye may not be using the correct display driver. Please refer to the /boot/firmware/config.txt file and ensure that dtoverlay=vc4-fkms-v3d or dtoverlay=vc4-kms-v3d is currently active. If you need to change this setting, please restart.
rpicam-hello
- This command is used to preview the camera and display the camera feed on the screen.
- Example:
- To preview the camera in real-time, execute the following command in the terminal
rpicam-hello -t 0
- Where -t 0 indicates continuous preview until the program is terminated, and users can adjust it according to their needs.
- Tuning Files:
- Libcamera on Raspberry Pi has tuning files for each different type of camera module. The parameters in these files are passed to the algorithms and hardware to produce the best quality images. Libcamera can only automatically determine the image sensor being used, not the entire module, even though the entire module affects the "tuning". Therefore, it is sometimes necessary to override the default tuning file for a specific sensor.
- For example, the NoIR (No Infra-Red filter) version of the sensor requires different AWB (Auto White Balance) settings compared to the standard version, so the IMX219 NoIR used with a Pi 4 or earlier device should be run as follows:
rpicam-hello --tuning-file /usr/share/libcamera/ipa/rpi/vc4/imx219_noir.json
- The Raspberry Pi 5 uses different tuning files in a different folder, so here you would use:
rpicam-hello --tuning-file /usr/share/libcamera/ipa/rpi/pisp/imx219_noir.json
- This also means that users can copy existing tuning files and make changes according to their preferences, as long as the --tuning-file parameter points to the new version.
- The --tuning-file parameter, like other command-line options, is applicable to all rpicam-apps.
rpicam-jpeg
- This command is a simple program for capturing static images. To capture a full-resolution JPEG image, use the following command, which will display a preview for about five seconds and then capture a full-resolution JPEG image to the file test.jpg.
- Example:
- Executing the following command in the terminal will display a preview for about 5 seconds and then take a full-pixel JPEG image:
rpicam-jpeg -o test.jpg
- Where test.jpg represents the filename.
- The -t <duration> option can be used to change the length of the preview display, and the --width and --height options will change the resolution of the captured static image.
rpicam-jpeg -o test.jpg -t 2000 --width 640 --height 480
Exposure Control:
- All of these rpicam-apps allow users to run the camera with a fixed shutter speed and gain. To capture an image with an exposure time of 20ms and a gain of 1.5x, the gain will be used as analog gain within the sensor until it reaches the maximum analog gain allowed by the kernel sensor driver, after which the remainder will be used as digital gain.
rpicam-jpeg -o test.jpg -t 2000 --shutter 20000 --gain 1.5
- Where --shutter 20000 represents an exposure of 20ms, and --gain 1.5 means the camera gain is set to 1.5x.
- The AEC/AGC algorithm on Raspberry Pi allows applications to specify exposure compensation: it can make the image darker or brighter by a given number of stops.
rpicam-jpeg --ev -0.5 -o darker.jpg
rpicam-jpeg --ev 0 -o normal.jpg
rpicam-jpeg --ev 0.5 -o brighter.jpg
- Digital Gain:
- Digital gain is applied by the ISP, not by the sensor. The digital gain will always be very close to 1.0 unless:
- The total requested gain (via the --gain option or through the exposure profile in camera adjustments) exceeds the gain that can be used as analog gain within the sensor. Only the additional gain needed will be used as digital gain.
- One of the color gains is less than 1 (please note that color gains are also used as digital gains). In this case, the reported digital gain will stabilize at 1 / the minimum (of red gain, blue gain). This means that a unit digital gain is applied to one of the color channels (other than the green channel).
- AEC/AGC is changing. When AEC/AGC moves, there is usually some degree of change in digital gain to try to eliminate any fluctuations, but it quickly returns to normal.
rpicam-still
- rpicam-still and rpicam-jpeg are very similar, mimicking many of the functions of the original raspistill application.
- Example: To take a photo, execute the following command in the terminal:
rpicam-still -o test.jpg
- Where test.jpg represents the filename.
- Encoder:
- rpicam-still allows files to be saved in multiple different formats. It supports png and bmp encoding. It also allows files to be saved as binary dumps of RGB or YUV pixels, without encoding or file format. In the latter case, the application reading the file must understand its own pixel arrangement.
rpicam-still -e png -o test.png
rpicam-still -e bmp -o test.bmp
rpicam-still -e rgb -o test.data
rpicam-still -e yuv420 -o test.data
- Note that the format in which the image is saved depends on the -e (equivalent to --encoding) option and is not automatically selected based on the output filename.
- Raw Image Capture
- A raw image is the image produced directly by the image sensor before any processing by the ISP (Image Signal Processor) or any CPU cores. For color image sensors, these are typically Bayer format images. Please note that raw images are quite different from the processed but unencoded RGB or YUV images we saw earlier.
- To capture a raw image:
rpicam-still --raw --output test.jpg
- Here, the -r option (also --raw) indicates capturing both the raw image and a JPEG. In practice, the raw image is the raw image from which the JPEG is generated. The raw image is saved in DNG (Adobe Digital Negative) format and is compatible with many standard applications (such as draw or RawTherapee). The raw image is saved to a file with the same name but with a .dng extension, hence test.dng.
- These DNG files contain metadata related to the image capture, including black level, white balance information, and the color matrix used by the ISP to generate the JPEG. This makes these DNG files more convenient for "manual" raw conversion using some of the tools mentioned above at a later time. Use exiftool to display all the metadata encoded into the DNG file:
File Name                       : test.dng
Directory                       : .
File Size                       : 24 MB
File Modification Date/Time     : 2021:08:17 16:36:18+01:00
File Access Date/Time           : 2021:08:17 16:36:18+01:00
File Inode Change Date/Time     : 2021:08:17 16:36:18+01:00
File Permissions                : rw-r--r--
File Type                       : DNG
File Type Extension             : dng
MIME Type                       : image/x-adobe-dng
Exif Byte Order                 : Little-endian (Intel, II)
Make                            : Raspberry Pi
Camera Model Name               : /base/soc/i2c0mux/i2c@1/imx477@1a
Orientation                     : Horizontal (normal)
Software                        : rpicam-still
Subfile Type                    : Full-resolution Image
Image Width                     : 4056
Image Height                    : 3040
Bits Per Sample                 : 16
Compression                     : Uncompressed
Photometric Interpretation      : Color Filter Array
Samples Per Pixel               : 1
Planar Configuration            : Chunky
CFA Repeat Pattern Dim          : 2 2
CFA Pattern 2                   : 2 1 1 0
Black Level Repeat Dim          : 2 2
Black Level                     : 256 256 256 256
White Level                     : 4095
DNG Version                     : 1.1.0.0
DNG Backward Version            : 1.0.0.0
Unique Camera Model             : /base/soc/i2c0mux/i2c@1/imx477@1a
Color Matrix 1                  : 0.8545269369 -0.2382823821 -0.09044229197 -0.1890484985 1.063961506 0.1062747385 -0.01334283455 0.1440163847 0.2593136724
As Shot Neutral                 : 0.4754476844 1 0.413686484
Calibration Illuminant 1        : D65
Strip Offsets                   : 0
Strip Byte Counts               : 0
Exposure Time                   : 1/20
ISO                             : 400
CFA Pattern                     : [Blue,Green][Green,Red]
Image Size                      : 4056x3040
Megapixels                      : 12.3
Shutter Speed                   : 1/20
- We note that there is only one calibration illuminant (the illuminant determined by the AWB algorithm, although it is always labeled as "D65"), and dividing the ISO number by 100 gives the analog gain being used.
- Long Exposure
- To capture images with long exposures, disable AEC/AGC and AWB, as these algorithms will force the user to wait for many frames while they converge.
- The way to disable them is by providing explicit values. Additionally, the --immediate option can be used to skip the entire preview phase of the capture. Therefore, to perform a 100-second exposure capture, use:
rpicam-still -o long_exposure.jpg --shutter 100000000 --gain 1 --awbgains 1,1 --immediate
- For reference, the maximum exposure times for the three official Raspberry Pi cameras can be found in this table.
rpicam-vid
- rpicam-vid可以帮助我们在树莓派设备上捕获视频。Rpicam-vid显示一个预览窗口,并将编码的比特流写入指定的输出。这将产生一个未打包的视频比特流,它没有被打包在任何类型的容器(如mp4文件)格式中。
- rpicam-vid请使用的是 H.264 编码
- 例如,下面的命令将一个10秒的视频写入一个名为test.h264的文件:
rpicam-vid -t 10s -o test.h264
- 其中-t 10s表示录制10秒的视频,test.h264表示文件名
- 您可以使用VLC和其他视频播放器播放结果文件:
VLC test.h264
- 在Raspberry Pi 5上,您可以通过指定输出文件的MP4文件扩展名直接输出到MP4容器格式:
rpicam-vid -t 10s -o test.mp4
- 编码器
- 树rpicam-vid支持动态JPEG以及未压缩和未格式化的YUV420:
rpicam-vid -t 10000 --codec mjpeg -o test.mjpeg
rpicam-vid -t 10000 --codec yuv420 -o test.data
- --codec选项设置的是输出格式,而不是输出文件的扩展名。
- segment选项将输出文件分割成段大小的块(以毫秒为单位)。通过指定非常短(1毫秒)的段,这可以方便地将运动JPEG流分解为单个JPEG文件。例如,下面的命令将1毫秒的段与输出文件名中的计数器结合起来,为每个段生成一个新的文件名:
rpicam-vid -t 10000 --codec mjpeg --segment 1 -o test%05d.jpeg
- 捕获高帧率视频
- 为了尽量减少高帧率(> 60fps)视频的帧丢失,请尝试以下配置调整:
- 将H.264的目标水平用 --level 4.2 这个参数设置为4.2
- 通过将denoise选项设置为cdn_off来禁用软件颜色降噪处理。
- 禁用nopreview的显示窗口以释放一些额外的CPU周期。
- 在/boot/firmware/config.txt中设置force_turbo=1,确保在视频捕获过程中CPU时钟不节流。有关更多信息,请参阅force_turbo文档。
- 将ISP输出分辨率参数调整为--width 1280 --height 720或更低,以实现帧率目标。
- 在Raspberry Pi 4上,您可以通过在/boot/firmware/config.txt中添加gpu_freq=550或更高的频率来超频GPU以提高性能。有关详细信息,请参阅在超频文档。
- 下面的命令演示了如何实现1280×720 120fps视频:
- 为了尽量减少高帧率(> 60fps)视频的帧丢失,请尝试以下配置调整:
rpicam-vid --level 4.2 --framerate 120 --width 1280 --height 720 --save-pts timestamp.pts -o video.264 -t 10000 --denoise cdn_off -n
- Libav与picam-vid的集成
- Rpicam-vid可以使用ffmpeg/libav编解码器后端对音频和视频流进行编码。您可以将这些流保存到文件中,也可以通过网络将它们流式传输。
- 要启用libav后端,将libav传递给 codec 选项:
rpicam-vid --codec libav --libav-format avi --libav-audio --output example.avi
- UDP
- 要使用树莓派作为服务器在UDP上流式传输视频,使用以下命令,将< IP -addr>占位符替换为客户端或多播地址的IP地址,并将<port>占位符替换为您想要用于流式传输的端口:
rpicam-vid -t 0 --inline -o udp://<ip-addr>:<port>
- 使用树莓派作为客户端通过UDP查看视频流,使用以下命令,将<port>占位符替换为您想要流式传输的端口:
vlc udp://@:<port> :demux=h264
- 或者,在客户端使用以下命令使用ffplay进行流:
ffplay udp://<ip-addr-of-server>:<port> -fflags nobuffer -flags low_delay -framedrop
- TCP
- 还可以通过TCP传输视频。使用树莓派作为服务器:
rpicam-vid -t 0 --inline --listen -o tcp://0.0.0.0:<port>
- 使用树莓派作为客户端通过TCP查看视频流,使用以下命令:
vlc tcp/h264://<ip-addr-of-server>:<port>
- 或者,在客户端使用以下命令以每秒30帧的速度使用ffplay流:
ffplay tcp://<ip-addr-of-server>:<port> -vf "setpts=N/30" -fflags nobuffer -flags low_delay -framedrop
- RTSP
- 要使用VLC通过RTSP传输视频,使用树莓派作为服务器,使用以下命令:
rpicam-vid -t 0 --inline -o - | cvlc stream:///dev/stdin --sout '#rtp{sdp=rtsp://:8554/stream1}' :demux=h264
- 使用树莓派作为客户端查看RTSP上的视频流,使用以下命令:
ffplay rtsp://<ip-addr-of-server>:8554/stream1 -vf "setpts=N/30" -fflags nobuffer -flags low_delay -framedrop
- 或者在客户端使用以下命令使用VLC进行流:
vlc rtsp://<ip-addr-of-server>:8554/stream1
- 如果需要关闭服务器上的预览窗口,使用nopreview命令。
- 使用内联标志强制流报头信息进入每个内帧,这有助于客户端在错过开头时理解流。
rpicam-raw
- rpicam-raw直接从传感器将视频记录为原始的 Bayer帧。它不显示预览窗口。将两秒钟的原始剪辑记录到一个名为test.raw的文件中,执行如下命令:
- 终端执行以下语句即可录制一个2秒的原始数据片段:
rpicam-raw -t 2000 -o test.raw
- Rpicam-raw输出没有任何格式信息的原始帧。应用程序将像素格式和图像尺寸打印到终端窗口,以帮助用户解析像素数据。
- 默认情况下,rpicam-raw在单个可能非常大的文件中输出原始帧。使用segment选项将每个原始帧定向到一个单独的文件,使用%05d指令使每个帧文件名唯一:
rpicam-raw -t 2000 --segment 1 -o test%05d.raw
- 通过快速存储设备,rpicam-raw可以以10fps的速度将18MB的1200万像素HQ相机帧写入磁盘。rpicam-raw无法将输出帧格式化为DNG文件;要实现这个功能,请使用 rpicam-still以低于10的帧率选项来避免掉帧的情况:
rpicam-raw -t 5000 --width 4056 --height 3040 -o test.raw --framerate 8
- 有关原始格式的更多信息,请参阅mode文档。
rpicam-detect
- 注意:树莓派操作系统不包含rpicam-detect。如果您已经安装了TensorFlow Lite,则可以构建rpicam-detect。有关更多信息,请参见rpicam-apps构建说明。不要忘记在运行cmake时传递-DENABLE_TFLITE=1。
- rpicam-detect显示一个预览窗口,并使用Google MobileNet v1 SSD (Single Shot Detector)神经网络来监控内容,该神经网络经过训练,可以使用Coco数据集识别大约80类对象。Rpicam-detect可以识别人、汽车、猫和许多其他物体。
- 每当rpicam-detect检测到目标对象时,它就捕获一个全分辨率JPEG。然后返回到监控预览模式。
- 有关模型使用的一般信息,请参阅TensorFlow Lite对象检测器部分。例如,当你外出时,你就能监视你的猫:
rpicam-detect -t 0 -o cat%04d.jpg --lores-width 400 --lores-height 300 --post-process-file object_detect_tf.json --object cat
rpicam参数设置
- 打印程序帮助信息,可以打印每个程序指令的可用设置选项,然后退出.
rpicam-hello -h
- --version 输出libcamera和rpicam-apps的版本字符串
rpicam-hello --version
- 示例输出:
rpicam-apps build: ca559f46a97a 27-09-2021 (14:10:24)
libcamera build: v0.0.0+3058-c29143f7
- --list-cameras 列出连接到树莓派的摄像头及其可用的传感器模式
rpicam-hello --list-cameras
- 传感器模式标识符有以下形式:
S<Bayer order><Bit-depth>_<Optional packing> : <Resolution list>
- 裁剪在原生传感器像素(即使在像素分割模式下)中指定为(<x>, <y>)/<Width>×<Height>。(x, y)指定 width × height大小的裁剪窗口在传感器阵列中的位置。
- 例如,以下输出显示索引为0的IMX219传感器和索引为1的IMX477传感器的信息:
Available cameras
-----------------
0 : imx219 [3280x2464] (/base/soc/i2c0mux/i2c@1/imx219@10)
    Modes: 'SRGGB10_CSI2P' : 640x480 [206.65 fps - (1000, 752)/1280x960 crop]
                             1640x1232 [41.85 fps - (0, 0)/3280x2464 crop]
                             1920x1080 [47.57 fps - (680, 692)/1920x1080 crop]
                             3280x2464 [21.19 fps - (0, 0)/3280x2464 crop]
           'SRGGB8' : 640x480 [206.65 fps - (1000, 752)/1280x960 crop]
                      1640x1232 [41.85 fps - (0, 0)/3280x2464 crop]
                      1920x1080 [47.57 fps - (680, 692)/1920x1080 crop]
                      3280x2464 [21.19 fps - (0, 0)/3280x2464 crop]
1 : imx477 [4056x3040] (/base/soc/i2c0mux/i2c@1/imx477@1a)
    Modes: 'SRGGB10_CSI2P' : 1332x990 [120.05 fps - (696, 528)/2664x1980 crop]
           'SRGGB12_CSI2P' : 2028x1080 [50.03 fps - (0, 440)/4056x2160 crop]
                             2028x1520 [40.01 fps - (0, 0)/4056x3040 crop]
                             4056x3040 [10.00 fps - (0, 0)/4056x3040 crop]
- --camera 选择要使用的相机。从可用摄像机列表中指定一个索引。
rpicam-hello --list-cameras 0
rpicam-hello --list-cameras 1
- --config -c,指定一个文件,里面包含了指令参数选项和值。一般是起名为example_configuration.txt的文件,将选项和值指定为键值对,每行一个选项
timeout=99000
verbose=
- 注意:省略通常在命令行中使用参数的前缀--。对于缺少值的标志,例如上面示例中的verbose,必须包含尾随的=。
- 然后可以运行以下命令,来指定99000毫秒的超时和详细输出:
rpicam-hello --config example_configuration.txt
- --time -t,默认5000毫秒的延时
rpicam-hello -t
- 指定应用程序在关闭前运行多长时间。这适用于视频录制和预览窗口。当捕获静止图像时,应用程序在捕获输出图像之前显示一个超时毫秒的预览窗口。
rpicam-hello -t 0
- --preview 设置桌面或DRM预览窗口的位置(x,y坐标)和大小(w,h尺寸)。不会影响从相机请求的图像的分辨率或宽高比
- 以以下逗号分隔的形式传递预览窗口尺寸:x,y,w,h
rpicam-hello --preview 100,100,500,500
- --fullscreen -f,强制预览窗口使用整个屏幕,没有边框或标题栏。缩放图像以适应整个屏幕。不接受值
rpicam-hello -f
- --qt-preview 使用Qt预览窗口,它比其他选项消耗更多的资源,但支持X窗口转发。与全屏标志不兼容。不接受值。
rpicam-hello --qt-preview
- --nopreview 使应用程序不显示预览窗口。不接受值
rpicam-hello --nopreview
- --info-text
- 默认值: "#%frame (%fps fps) exp %exp ag %ag dg %dg"
- 在桌面环境中运行时,将提供的字符串设置为预览窗口的标题。支持以下图像元数据替换:
指令	说明
%frame	帧序列号
%fps	瞬时帧速率
%exp	捕捉图像时的快门速度, 单位是ms
%ag	感光芯片控制的图像模拟增益
%dg	通过ISP控制的图像数值增益
%rg	每个像素点红色组件的增益
%bg	每个像素点蓝色组件的增益
%focus	图像的角点度量,数值越大表示图像越清晰
%lp	当前镜头的屈光度 (1/米为单位的距离)
%afstate	自动对焦状态 (idle, scanning, focused, failed)
rpicam-hello --info-test "Focus measure: %focus"
- --width
- --height
- 每个都接受一个单独的数字来定义所捕获图像的尺寸(以像素为单位)。
- 对于rpicam-still、rpicam-jpeg和rpicam-vid,指定输出分辨率。
- 对于rpicam-raw,指定原始帧分辨率。对于具有2×2 bin读出模式的相机,指定一个等于或小于bin模式的分辨率捕获2×2 bin原始帧。
- 对于rpicam-hello没有效果。
- 录制1080p的视频
rpicam-vid -o test.h264 --width 1920 --height 1080
- 捕获2028×1520分辨率的JPEG。如果与HQ相机一起使用,则使用2×2 bin模式,因此原始文件(test. ng)包含2028×1520原始Bayer图像。
rpicam-still -r -o test.jpg --width 2028 --height 1520
- --viewfinder-width
- --viewfinder-height
- 每个参数都能接受一个数字,以像素为单位定义预览窗口中显示的图像的尺寸。不影响预览窗口的尺寸,因为图像会调整大小以适应。不影响捕获的静止图像或视频。
rpicam-still --viewfinder-width 1920 --viewfinder-height 1080
- --mode 允许以以下冒号分隔格式指定相机模式:<width>:<height>:<bit-depth>:<packing>,如果提供的值没有精确匹配,系统将为传感器选择最接近的可用选项。可以使用packed(P)或者unpacked(U)的打包格式,影响存储的视频和静止图像的格式,但不影响传递到预览窗口的帧的格式。
- Bit-depth和packing是可选的,Bit-depth默认是12,Packing默认为P(已打包)。有关传感器可用的位深度、分辨率和packing选项的信息,请参见list-cameras。如下所示:
- 4056:3040:12:P - 4056×3040 resolution, 12 bits/pixel, packed.
- 1632:1224:10 - 1632×1224 resolution, 10 bits/pixel.
- 2592:1944:10:U - 2592×1944 resolution, 10 bits/pixel, unpacked.
- 3264:2448 - 3264×2448 resolution.
- --viewfinder-mode 与mode选项相同,但它适用于传递给预览窗口的数据。有关更多信息,请参阅mode文档。
- ---lores-width 和 --lores-height
- 提供来自相机的第二个低分辨率图像流,按比例缩小到指定的尺寸。每个都接受一个数字来定义低分辨率流的维度(以像素为单位)。可用于预览和视频模式。不提供静态捕获。对于rpicam-vid,禁用额外的颜色去噪处理。对结合图像后处理的图像分析有用。
rpicam-hello --lores-width 224 --lores-height 224
- --hflip 水平翻转图像。不接受值。
rpicam-hello --hflip -t 0
- --vflip 垂直翻转图像。不接受值。
rpicam-hello --vflip -t 0
- --rotation 旋转从传感器提取的图像。只接受值0或180。
rpicam-hello --rotation 0
- --roi 对从传感器全域提取的图像进行裁剪。接受四个十进制值,范围从0到1,格式如下:<x>,<y>,<w>,<h>。这些值中的每一个都以0到1之间的小数表示可用宽度和高度的百分比。
- 这些值定义了以下比例:
<x>:在提取图像之前要跳过的x坐标
<y>:在提取图像之前要跳过的y坐标
<w>:要提取的图像宽度
<h>:要提取的图像高度
- 默认为0,0,1,1(从第一个X坐标和第一个Y坐标开始,使用100%的图像宽度,使用100%的图像高度)。
- 例子:
- rpicam-hello --roi 0.25,0.25,0.5,0.5选择从图像中心裁剪的像素总数的一半(跳过前25%的X坐标,跳过前25%的Y坐标,使用图像总宽度的50%,使用图像总高度的50%)。
- rpicam-hello --roi 0,0,0.25,0.25选择从图像左上角裁剪的像素总数的四分之一(跳过X坐标的前0%,跳过Y坐标的前0%,使用图像宽度的25%,使用图像高度的25%)。
- --rotation 旋转从传感器提取的图像。只接受值0或180。
- off -禁用HDR。
- auto -在支持的设备上启用HDR。如果可用,使用传感器的内置HDR模式。如果传感器没有内置HDR模式,则使用板载HDR模式(如果可用)。
- single-exp 在支持的设备上启用HDR。如果可用,使用传感器的内置HDR模式。如果传感器没有内置HDR模式,则使用板载HDR模式(如果可用)。
rpicam-hello --hdr
- 使用板载HDR模式,如果可用,即使传感器有一个内置的HDR模式。如果板载HDR模式不可用,则禁用HDR。
- Raspberry Pi 5及更高版本的设备具有板载HDR模式。
- 要检查传感器中内置的HDR模式,将此选项添加到列表相机中。
rpicam-hello --rotation 0
camera控制选项
- 以下选项控制影响相机图像质量的图像处理和算法。
- sharpness
- 设置图像清晰度。接受以下范围内的数值:
- 0.0是不应用锐化
- 大于0.0但小于1.0的值应用的锐化量小于默认值
- 1.0应用默认锐化量
- 大于1.0的值应用额外的锐化
- 设置图像清晰度。接受以下范围内的数值:
rpicam-hello --sharpness 0.0
- contrast
- 指定图像对比度。接受以下范围内的数值:
- 0.0适用最小对比度
- 大于0.0但小于1.0的值应用的对比度小于默认值
- 1.0应用默认的对比度
- 大于1.0的值应用额外的对比度
- 指定图像对比度。接受以下范围内的数值:
rpicam-hello --contrast 0.0
- brightness
- 指定图像亮度,作为输出图像中所有像素的偏移量添加。接受以下范围内的数值:
- -1.0最小亮度(黑色)
- 0.0应用标准亮度
- 1.0应用最大亮度(白色)
- 对于更多的用法,推荐ev。
- 指定图像亮度,作为输出图像中所有像素的偏移量添加。接受以下范围内的数值:
rpicam-hello --brightness 1.0
- saturation
- 指定图像颜色饱和度。接受以下范围内的数值:
- 0.0应用最小饱和度(灰度)
- 大于0.0但小于1.0的值应用的饱和度小于默认值
- 1.0应用默认的饱和度
- 大于1.0的值应用额外的饱和度
- 指定图像颜色饱和度。接受以下范围内的数值:
rpicam-hello --saturation 0.6
- ev
- 指定图像的曝光值(EV)补偿。接受一个数值,该数值控制沿着以下频谱传递给自动曝光/增益控制(AEC/AGC)处理算法的目标值:
- -10.0应用最小目标值
- 0.0应用标准目标值
- 10.0应用最大目标值
- 指定图像的曝光值(EV)补偿。接受一个数值,该数值控制沿着以下频谱传递给自动曝光/增益控制(AEC/AGC)处理算法的目标值:
rpicam-hello --ev 10.0
- shutter
- 指定使用快门的曝光时间,以微秒为单位。当您使用此选项时,增益仍然可以变化。如果相机运行的帧率太快,它不允许指定的曝光时间(例如,帧率为1fps,曝光时间为10000微秒),传感器将使用帧率允许的最大曝光时间。
- 有关官方相机的最小和最大快门时间列表,请参阅相机硬件文档。高于最大值的值会导致未定义的行为。
rpicam-hello --shutter 10000
- gain
- analoggain与gain的效果是一样的
- 设置组合模拟和数字增益。当传感器驱动可以提供所要求的增益时,只使用模拟增益。当模拟增益达到最大值时,ISP应用数字增益。接受数值。
- 有关官方摄像机的模拟增益限制列表,请参阅摄像机硬件文档。
- 有时,即使在不超过模拟增益限制的情况下,数字增益也会超过1.0。这可能发生在以下情况:
- 其中任何一个颜色增益低于1.0,这将导致数字增益稳定在1.0/min(红增益,蓝增益)。这使总数字增益应用于任何高于1.0的颜色通道,以避免变色伪影。
- 自动曝光/增益控制(AEC/AGC)变化时的轻微差异。
rpicam-hello --gain 0.8
- metering 默认值:centre
- 设置自动曝光/增益控制(AEC/AGC)算法的测光模式。接受以下值:
- centre 中心加权计量
- spot 点测光
- average 平均或全帧测光
- custom 自定义测光模式定义在相机调整文件
- 有关定义自定义测光模式和在现有测光模式中调整区域权重的更多信息,请参阅Raspberry Pi相机和libcamera的调谐指南。
- 设置自动曝光/增益控制(AEC/AGC)算法的测光模式。接受以下值:
rpicam-hello --metering centre
- exposure
- 设置曝光配置文件。更改曝光配置文件不应影响图像曝光。相反,不同的模式调整增益设置,以达到相同的净结果。接受以下值:
- sport:曝光时间短,收益大
- normal:正常暴露,正常增益
- long:曝光时间长,收益小
- 您可以使用调谐文件编辑曝光配置文件。有关更多信息,请参阅Raspberry Pi相机和libcamera的调谐指南。
- 设置曝光配置文件。更改曝光配置文件不应影响图像曝光。相反,不同的模式调整增益设置,以达到相同的净结果。接受以下值:
rpicam-hello --exposure sport
- awb
- 设置曝光配置文件。更改曝光配置文件不应影响图像曝光。相反,不同的模式调整增益设置,以达到相同的最终结果。接受以下值: 可用的白平衡模式:
模式	        色温
auto	        2500K ~ 8000K
incadescent	2500K ~ 3000K
tungsten	3000K ~3500K
fluorescent	4000K ~ 4700K
indoor	        3000K ~ 5000K
daylight	5500K ~ 6500 K
cloudy	        7000K ~ 8500K
custom	        自定义范围, 通过调谐文件设置
- 这些值只是近似值:值可能会根据相机调整而变化。
- 没有模式完全禁用AWB。相反,你可以用awbgains来修正颜色增益。
- 有关AWB模式的更多信息,包括如何定义自定义模式,请参阅Raspberry Pi相机和libcamera的调谐指南。
rpicam-hello --awb auto
- awbgains
- 设置一个固定的红蓝增益值来代替自动白平衡(AWB)算法。设置非零值禁用AWB。接受以逗号分隔的数字输入,格式如下:<red_gain>,<blue_gain>
rpicam-jpeg -o test.jpg --awbgains 1.5,2.0
- denoise
- 默认值:auto
- 设置去噪模式。接受以下值:
- auto:启用标准空间降噪。对视频使用超快的彩色去噪,对图像使用高质量的彩色去噪。在预览窗口中不启用额外的颜色噪点。
- off:关闭空间和颜色去噪。
- cdn_off:禁用颜色噪点。
- cdn_fast:使用快速颜色去噪。
- cdn_hq:使用高质量的颜色去噪。由于吞吐量降低,不适合视频/取景器。
- 即使是快速的色彩降噪也会降低帧率。高质量的色彩降噪显著降低了帧率。
rpicam-hello --denoise off
- tuning-file
- 指定摄像机调谐文件。调整文件允许您控制图像处理的许多方面,包括自动曝光/增益控制(AEC/AGC),自动白平衡(AWB),色彩阴影校正,色彩处理,去噪等等。接受调谐文件路径作为输入。 有关调谐文件的详细信息,请参见调谐文件。
- autofocus-mode
- 默认值:default
- 指定自动对焦模式。接受以下值:
- default:将相机置于连续自动对焦模式,除非镜头位置或自动对焦捕捉覆盖到手动模式
- manual:不移动镜头,除非手动配置镜头位置
- auto:仅在相机启动时或在捕捉之前移动镜头进行自动对焦扫描,如果也使用了自动对焦捕捉功能
- continuous:随场景变化自动调整镜头位置
- 此选项仅支持某些相机模块。
rpicam-hello --autofocus-mode auto
- autofocus-range
- 默认值:normal
- 指定自动对焦范围。接受以下值:
- normal:聚焦范围相当接近无穷远
- macro:仅对焦近处的物体,包括相机支持的最近焦距
- full:聚焦整个范围,从最近的物体到无穷远
- 此选项仅支持某些相机模块。
rpicam-hello autofocus-range normal
- autofocus-speed
- 默认值:normal
- 指定自动对焦速度。接受以下值:
- normal:以正常速度改变镜头位置
- fast:快速改变镜头位置
- 此选项仅支持某些相机模块。
rpicam-hello --autofocus-speed normal
- autofocus-window*
- 指定传感器全域内的自动对焦窗口。接受四个十进制值,范围从0到1,格式如下:<x>,<y>,<w>,<h>。这些值中的每一个都以0到1之间的小数表示可用宽度和高度的百分比。
- 这些值定义了以下比例:
- <x>:在应用自动对焦之前要跳过的x坐标
- <y>:在应用自动对焦之前要跳过的y坐标
- <w>:自动对焦区域宽度
- <h>:自动对焦区域高度
- 默认值在两个维度中使用输出图像的中间三分之一(总图像区域的1/9)。
- 例子:
rpicam-hello—autofocus-window 0.25,0.25,0.5,0.5
- 选择从图像中心裁剪的像素总数的一半(跳过前25%的X坐标,跳过前25%的Y坐标,使用图像总宽度的50%,使用图像总高度的50%)。
rpicam-hello—autofocus-window 0,0,0.25,0.25
- 选择从图像左上角裁剪的像素总数的四分之一(跳过X坐标的前0%,跳过Y坐标的前0%,使用图像宽度的25%,使用图像高度的25%)。
此选项仅支持某些相机模块。
- lens-position*
- 默认值:default
- 将镜头移动到一个固定的焦距,通常以屈光度表示(单位为1/米距离)。接受以下值范围:
- 0.0:将镜头移动到“无限远”位置
- 任何其他数字:将镜头移动到1 /数字位置。例如,值2.0将聚焦在大约0.5m处
- normal:将镜头移动到与镜头超焦距位置相对应的默认位置
- 镜头校准并不完善,因此同一型号的不同相机模块可能会有所不同。
- verbose*
- 别名:-v
- 默认值:1
- 设置详细程度。接受以下值:
- 0:无输出
- 1:正常输出
- 2:详细输出
rpicam-hello --verbose 1
- 更详细的资料,点击这里参考。
libcamera软件栈
libcamera-hello
- 该命令用来预览摄像头并将摄像头画面显示在屏幕上。
- 示例:
- 终端执行以下语句即可实时预览摄像头
libcamera-hello -t 0
- 其中 -t 0 表示一直预览至终止程序,用户可根据自己的需要进行调整。
- 调谐文件:
- 树莓派的libcamera驱动会针对不同的摄像头模块调用一个调谐文件,调谐文件中提供了各种参数,器调用摄像头的时候,libcamera会调用调谐文件中的参数,结合算法对图像进行处理最终输出成预览画面。由于libcamera驱动只能自动感光芯片信号,但是摄像头的最终显示效果还会受整个模块的影响,调谐文件的使用就是为了可以灵活处理不同模块的摄像头,调整提高图像质量。
- 如果在使用默认调谐文件的情况下,摄像头的输出图像不理想的话,用户可以通过调用自定义的调谐文件来对图像进行调整。比如,如果你使用的是官方的NOIR版本摄像头,相对于于Raspberry Pi Camera V2 常规款,NOIR摄像头可能需要不同的白平衡参数,这种情况下就可以通过调用调谐文件来进行切换。
libcamera-hello --tuning-file /usr/share/libcamera/ipa/raspberrypi/imx219_noir.json
- 用户可以复制默认的调谐文件,根据自己的需求进行修改。
- 备注:调谐文件的使用适用于其他的libcamera指令,后续指令中就不再做介绍
- 预览窗口:
- 大部分的libcamera指令都会显示一个预览窗口在屏幕上,用户可以通过--info-text 参数来自定义预览窗口的标题信息, 同时也可以通过%directives 调用一些摄像头参数并显示在窗口上
- 比如如果使用HQ Camera: 可以通过--info-txe "%focus" 在窗口上显示摄像头的焦距
libcamera-hello --info-text "focus %focus"
- 备注:更多关于参数的设置,可以参考后续的指令参数设置章节
libcamera-jpeg
- 该命令一个简单的静态图片拍摄程序,libcamera-jpeg相对于libcamera-still来讲更加简洁,并且有很多相同的功能来完成图片拍摄。
- 示例:
- 终端执行以下语句会显示一个5秒左右的预览串口,然后拍摄一张全像素的JPEG图像:
libcamera-jpeg -o test.jpg
- 其中test.jpg表示文件名
- 曝光控制:
- 用户可以通过-t 参数来设置预览时间,同时可以通过--width 和 --height来设置拍摄图像的分辨率。例如
libcamera-jpeg -o test.jpg -t 2000 --width 640 --height 480
- 所有的libcamera指令都允许用户自己设置快门时间和增益,比如:
libcamera-jpeg -o test.jpg -t 2000 --shutter 20000 --gain 1.5
- 其中 --shutter 20000 表示曝光 20ms, --gain 1.5 表示摄像头增益被设置为1.5倍。
- 这个指令会拍摄一张图像,拍摄中会曝光20ms并且摄像头增益被设置为1.5倍。设置的增益参数,会首先设置感光芯片内部的模拟增益参数,如果设置的增益超过了驱动内置的最大的模拟增益的数值,会先设置芯片的最大模拟增益,然后将剩下的增益倍数作为数字增益来生效。
- 备注:数字增益是通过ISP(图像信号处理)来实现的,并非是直接调整芯片内置寄存器。正常情况下,默认的数字增益趋近于1.0,除非是有有以下三种情况。
- 整体的增益参数需求,也就是当模拟增益无法满足设定的增益参数需求的时候,会需要数字增益来做补偿
- 其中一个颜色增益小于1 (颜色增益是通过数字增益来实现的),在这种情况下, 最后获得增益就是稳定为 1/min(red_gain, blue_gain), 也就是实际是上应用了统一的数字增益, 且是其中一个颜色通道的增益值(非绿色通道)。
- AEC/AGC被修改了。如果AEC/AGC有变化的时候, 数值增益也会一定程度上会发生变化,从何来来消除任何波动,但是这种变化会被快速恢复到"正常"值
- 树莓派的AEC/AGX算法允许程序指定曝光补偿,也就是通过设置光圈数值来调整图像的亮度。比如:
libcamera-jpeg --ev -0.5 -o darker.jpg
libcamera-jpeg --ev 0 -o normal.jpg
libcamera-jpeg --ev 0.5 -o brighter.jpg
libcamera-still
- libcamera-still和libcamera-jpeg非常相似,不同的是libcamera继承了更多raspistill的功能。
- 示例:终端执行以下语句即可拍照
libcamera-still -o test.jpg
- 其中test.jpg表示文件名
- 编码器:
- libcamea-still支持不同格式的图像文件,可以支持png和bmp编码,也支持直接不带编码或者任何图像格式地将RGB或者YUV像素的二进制转储保存成文件。如果是直接保存RGB或者YUV数据,程序在读取此类文件的时候必须了解文件的像素排列方式。
libcamera-still -e png -o test.png
libcamera-still -e bmp -o test.bmp
libcamera-still -e rgb -o test.data
libcamera-still -e yuv420 -o test.data
- 图像保存的格式是通过-e参数控制的, 如果没有调用-e参数设置的话,默认按照输出的文件名的格式保存。
- 原始图像拍摄
- 原始图像(Raw image)图像就是直接图像传感器输出的图像, 没有经过任何ISP或者CPU处理。对于彩色相机传感器,一般来说原始图像的输出格式是Bayer. 注意原始图和我们之前说的位编码的RGB和YUV图像不同,RGB和YUV也是经过ISP处理后的图像的。
- 拍摄一张原始图像的指令:
libcamera-still -r -o test.jpg
- 原始图像一般是以DNG (Adobe digital Negative) 格式保存的,DNG格式可以兼容大部分标准程序, 比如dcraw 或者RawTherapee. 原始图像会被保存为.dng后缀的相同名字的文件,比如如果运行上面的指令,为被另存为test.dng, 并同时生成一张jpeg文件。DNG文件中包含了已图像获取有关的元数据, 比如白平衡数据,ISP颜色矩阵等。
- 超长曝光
- 如果要拍摄一张超长曝光的图片,我们需要禁用AEC/AGC和白平衡,否则这些算法会导致图片在收敛的时候多等待很多帧数据。禁用这些算法需要另设置显式值,另外, 用户可以通过--immediate设置来跳过预览过程。
- 这里是拍摄一张曝光100秒的图像指令:
libcamera-still -o long_exposure.jpg --shutter 100000000 --gain 1 --awbgains 1,1 --immediate
- 备注:几款官方摄像头的最长曝光时间参考表格.
libcamera-vid
- libcamera-vid是一个视频录制程序, 默认使用的是树莓派的硬件H.264编码器。这个程序运行之后会在屏幕上显示一个预览窗口,同时将比特流编码输出到指定文件。
- 示例:终端执行以下语句即可录制视频
libcamera-vid -t 10000 -o test.h264
- 其中-t 10000 表示录制10秒的视频,test.h264表示文件名
- 如果要查看视频可以用vlc来进行播放
vlc test.h264
- 备注:录制的是未打包的视频流, 用户可以使用--save-pts 设置输出时间戳,方便后续将比特流转成其他视频格式。
libcamera-vid -o test.h264 --save-pts timestamps.txt
- 如果想要输出mkv文件,可以用以下指令:
mkvmerge -o test.mkv --timecodes 0:timestamps.txt test.h264
- 编码器
- 树莓派支持JPEG格式以及没有压缩和格式的YUV420:
libcamera-vid -t 10000 --codec mjpeg -o test.mjpeg
libcamera-vid -t 10000 --codec yuv420 -o test.data
- --codec选项设置的是输出格式,而不是输出文件的扩展名。
- 使用--segment参数可以将输出文件分割成段(单位是ms),适用于需要脚JPEG视频流分割成单独的时间比较短(大概1ms)的JPEG文件
libcamera-vid -t 10000 --codec mjpeg --segment 1 -o test%05d.jpeg
- UDP 视频流传输
- 可以使用UDP进行视频流传输,树莓派端运行(server):
libcamera-vid -t 0 --inline -o udp://<ip-addr>:<port>
- 其中<ip-addr>需要替换成实际的客户端IP地址或者组播地址。
- 在客户端(client),输入以下指令进行视频流获取和显示(两个指令使用一种即可);
vlc udp://@:<port> :demux=h264
vlc udp://@:<port> :demux=h264
- 注意:port需要跟你在树莓派端设置的一致
- TCP视频流传输
- 可以使用TCp进行视频流传输, 树莓派端运行(server):
libcamera-vid -t 0 --inline --listen -o tcp://0.0.0.0:<port>
- 客户端(client)运行:
vlc tcp/h264://<ip-addr-of-server>:<port> #两条指令选一条即可
ffplay tcp://<ip-addr-of-server>:<port> -vf "setpts=N/30" -fflags nobuffer -flags low_delay -framedrop
- RTSP视频流传输
- 在树莓派上,通常使用vlc来对RTSP视频流做处理,
libcamera-vid -t 0 --inline -o - | cvlc stream:///dev/stdin --sout '#rtp{sdp=rtsp://:8554/stream1}' :demux=h264
- 播放端,可以运行以下任一条指令:
vlc rtsp://<ip-addr-of-server>:8554/stream1
ffplay rtsp://<ip-addr-of-server>:8554/stream1 -vf "setpts=N/30" -fflags nobuffer -flags low_delay -framedrop
- 在所有预览指令中,如果想要关掉树莓派端的预览窗口,可以用参数-n(--nopreview)设置。另外注意--inline参数的设置,改设置会强制将视频流的报头信息包含在每个 I (intra)帧中,这个设置可以让客户端在丢失视频头的情况下仍然可以正确解析视频流。
- 高帧率模式
- 如果使用libcamera-vid指令录制高帧率视频(一般高于60fps),同时减少丢帧情况,需要注意以下几点:
- H264 的目标级别需要设置成4.2, 可以使用--level 4.2 参数设置
- 必须关闭彩色降噪功能,可以使用--denoise cdn_off参数设置
- 如果设置的帧率高于100fps,关掉预览窗口,释放更多CPU资源,避免丢帧。可以使用参数-n设置
- 建议在/boot/config.txt文件中添加设置force_turbo=1, 来保证视频流或中中,CPU时钟不会被限制
- 调整ISP输出分辨率,使用-width 1280 --height 720 设置分辨率,或者设置成更低的分辨率,具体以摄像头型号为准。
- 如果你使用的是Pi 4或这个更高性能的型号,可以在/boot/config.txt文件中添加设置gpu_freq=550或者更高,来对主板GPU进行超频,来达到更高的性能效果。
- 例如,录制 1280 x720 120fps视频。
- 如果使用libcamera-vid指令录制高帧率视频(一般高于60fps),同时减少丢帧情况,需要注意以下几点:
libcamera-vid --level 4.2 --framerate 120 --width 1280 --height 720 --save-pts timestamp.pts -o video.264 -t 10000 --denoise cdn_off -n
libcamera-raw
- libcamera-raw类似于视频录制程序,不同的地方时,libcamera-raw录制的是直接传感器输出的Bayer格式的数据,也就是原始图像数据。libcamera-raw不会显示预览窗口。
- 终端执行以下语句即可录制一个2秒的原始数据片段:
libcamera-raw -t 2000 -o test.raw
- 程序会在没有格式信息的情况下直接转储原始帧,程序会将像素格式和图像尺寸直接打印在终端,用户可以根据输出的数据查看像素数据.默认情况下,程序会将原始帧保存成一个文件,文件通常比较大,用户可以通过--segement参数将文件进行分割。
libcamera-raw -t 2000 --segment 1 -o test%05d.raw
- 如果内存条件比较好(比如使用SSD), libcamera-raw可以以大概10帧每秒的速度将官方的HQ Camera的数据(大概18MB每帧)写入到硬盘中, 为了达到这个速度,程序写入的是没有格式化过的原始帧,没有办法像libcamera-still那样保存成DNG文件。 如果想要确保不出现丢帧的情况,可以使用--framerate 降低帧率。
libcamera-raw -t 5000 --width 4056 --height 3040 -o test.raw --framerate 8
通用的指令设置选项
通用的指令设置选项适用于libcamera的所有指令
- 打印程序帮助信息,可以打印每个程序指令的可用设置选项,然后退出.
--help -h
- 所有libcamera-apps 在看到 --version 选项时,都会打印出 libcamera 和 libcamera-apps 的版本字符串,然后退出
--version
libcamera-apps build: ca559f46a97a 27-09-2021 (14:10:24)
libcamera build: v0.0.0+3058-c29143f7
- 显示识别到的可支持的摄像头,同时列出了每个摄像头支持的传感器模式。
--list-cameras
Available cameras
-----------------
0 : imx219 [3280x2464] (/base/soc/i2c0mux/i2c@1/imx219@10)
    Modes: 'SRGGB10_CSI2P' : 640x480 [206.65 fps - (1000, 752)/1280x960 crop]
                             1640x1232 [41.85 fps - (0, 0)/3280x2464 crop]
                             1920x1080 [47.57 fps - (680, 692)/1920x1080 crop]
                             3280x2464 [21.19 fps - (0, 0)/3280x2464 crop]
           'SRGGB8' : 640x480 [206.65 fps - (1000, 752)/1280x960 crop]
                      1640x1232 [41.85 fps - (0, 0)/3280x2464 crop]
                      1920x1080 [47.57 fps - (680, 692)/1920x1080 crop]
                      3280x2464 [21.19 fps - (0, 0)/3280x2464 crop]
1 : imx477 [4056x3040] (/base/soc/i2c0mux/i2c@1/imx477@1a)
    Modes: 'SRGGB10_CSI2P' : 1332x990 [120.05 fps - (696, 528)/2664x1980 crop]
           'SRGGB12_CSI2P' : 2028x1080 [50.03 fps - (0, 440)/4056x2160 crop]
                             2028x1520 [40.01 fps - (0, 0)/4056x3040 crop]
                             4056x3040 [10.00 fps - (0, 0)/4056x3040 crop]
- 按照打印的信息, IMX219摄像头后缀0, IM新477摄像头后缀1. 在调用摄像头的时候,就可以对应的后缀进行指定
- 指定摄像头
--camera
- 对应的后缀可以参考指令--list-camera的打印信息。
- 设置指定文件
--config -c
- 一般情况下,我们可以通过指令直接设置摄像头参数,这里使用--config参数,可以指定设置文件,直接读取文件中的设置参数来对摄像头预览效果进行设置。例如:
libcamera-hello -c config.txt
- 其中的设置文件中,一行一个设置参数,用key=value的格式,例如:
timeout=99000
verbose=
- 注:即使是隐式选项也需要使用 =,而且命令行中使用的 -- 也被省略了。只允许使用长格式选项(不接受 t=99000)。
- 设置了程序运行时间
--timeout -t
- 如果运行的是视频录制指令,timeout选项设置的是录制时长,如果运行的是图像拍摄指令,timeout设置的拍摄并输出图像之前的预览时间。
- 如果在运行libcamera程序的时候没有设置timeout,默认的timeout数值就是5000(5秒), 如果将timeout设置为0,那程序就会一直运行。例如:
libcamera-hello -t 0
预览窗口
- 预览窗口设置
--preview -p
- -p 设置预览预览窗口大小以及窗口的位置(则合格设置在 X和DRM版本的窗口中都有效),设置格式为 --preview <x. y, w, h> 其中x y设置预览窗口在显示屏上的坐标位置, w和h设置的是预览窗口的宽度和长度
- 预览串口的设置不会影响摄像头图像预览的分辨率和宽高比。 程序会将预览图像缩放到预览窗口中显示,并会按照原来的图像宽高比做适配。例如:
libcamera-hello -p 100,100,500,500
- 全屏预览模式
--fullscreen -f
- -f选项设置预览窗口全屏显示,全屏显示模式的预览窗口和边框。同-p一样,不会影响分辨率和宽高比,会自动适配。例如:
libcamera-still -f -o test.jpg
- 使用基于 Qt 的预览窗口
--qt-preview
- 使用基于QT框架的预览窗口, 正常情况下不推荐用这个设置,因为这个预览程序不会使用零拷贝缓冲区共享以及GPU加速, 这个会导致占用资源过高。 QT预览窗口支持X转发(默认预览程序不支持).
- Qt预览串口不支持--fullscreen设置选项, 如果用户要使用Qt预览,建议保持小预览窗口,避免资源占用过高影响系统正常运行。例如:
libcamera-hello --qt-preview
- 不预览图像
--nopreview -n
- 这个设置会关掉图像预览功能.示例:
libcamera-still -n -o test.jpg
- 设置预览窗口的标题和信息显示
--info-text
- 提供的字符串被设置为预览窗口(在X Windows下运行时)的标题。此外,字符串中可能包含多个%指令,这些指令由图像元数据中的信息替代。允许的指令:
指令	说明
%frame	帧序列号
%fps	瞬时帧速率
%exp	捕捉图像时的快门速度, 单位是ms
%ag	感光芯片控制的图像模拟增益
%dg	通过ISP控制的图像数值增益
%rg	每个像素点红色组件的增益
%bg	每个像素点蓝色组件的增益
%focus	图像的角点度量,数值越大表示图像越清晰
%lp	当前镜头的屈光度 (1/米为单位的距离)
%afstate	自动对焦状态 (idle, scanning, focused, failed)
- 如果没有指定窗口信息,默认的--info-text设置为 "#%frame (%fps fps) exp %exp ag %ag dg %dg"。例如:
libcamera-hello --info-text "Focus measure: %focus"
摄像头分辨率和读数
- 设置图像的分辨率
--width
--height
- 这两个参数分别设置图像的宽度和高度。对于libcamera-still, libcamera-jpeg和libcamera-vid指令,这两个参数可以设置输出图像/视频的分辨率。
- 如果使用libcamera-raw指令,这两个参数会影响获取的元数据帧的大小。 摄像头有一个2x2的分块读取模式,如果设置的分辨率小于分开模式, 摄像头会按照2x2的分块大小获取元数据帧。
- 如果使用libcamera-hello指令,无法指定分辨率.
- 示例:
libcamera-vid -o test.h264 --width 1920 --height 1080 录制1080p视频
libcamera-still -r -o test.jpg --width 2028 --height 1520 拍摄一张分辨率为2028x1520的JPEG图像。
- 设置预览图像的分辨率
--viewfinder-width
--viewfinder-height
- 该设置仅影响预览的图像大小(指libcamera-hello、libcamera-jpeg和libcamera-still的预览阶段)。并不会影响最终输出的图像或者视频的分辨率。 预览图像大小的设备不会影响预览窗口尺寸,会根据窗口适配。例如:
libcamera-hello --viewfinder-width 640 --viewfinder-height 480
- 强制分辨率
--rawfull
- 无论要求的输出分辨率(由 --width 和 --height 给定)如何,该选项都会强制传感器以全分辨率读出模式进行静态和视频捕捉。:此设置libcamera-hello无效。
- 使用该选项通常会导致帧速率下降,全分辨率模式下,帧读取速度会比较慢。例如:
libcamera-raw -t 2000 --segment 1 --rawfull -o test%03d.raw
- 指令会捕捉多个全分辨率原始图像。如果你使用的是HQ摄像头。每个帧的大小为18MB,而如果没有设置--rawfull,HQ摄像头默认的是2x2模式, 每帧的数据大小只有4.5MB.
- 指定传感器模式
--mode
- 这个参数比rawfull更通用,用于设置摄像头模式,使用的时候,需要指定宽度,高度,位深度和打包模式,并用冒号分割。设置的数值不一定要完全精确,系统会自动匹配最接近的数值,另外位深度和打包模式是可设置的(默认为12和P,表示打包).例如:
- 4056:3040:12:P - 4056x3040分辨率,12bit每像素, 打包。打包意味着原始图像数据会在缓冲区被打包,这种情况下,两个像素点仅会占用3个字节,可以节省内存
- 1632:1224:10 - 1632x1224分辨率,10bit每像素, 默认打包。10-bit 打包的模式下,4个像素点数据会占用5 bytes.
- 2592:1944:10:U -2592x1944分辨率,10bits每像素,不打包。不打包的情况下,每个限速会占用2bytes内存,这种情况下,最高的6 bits会被设置为0
- 3262:2448 -3264x2448分辨率, 默认使用12bits和打包模式。 但是,如果摄像头型号,比如Camera V2 (IMX219)不支持12bits模式,系统会自动选择为10bits模式
- --mode参数是用来在录制视频和拍摄静态图像的时候设置摄像头模式,如果想要在预览的时候设置,可以用--viewfinder-mode
- 这个参数比rawfull更通用,用于设置摄像头模式,使用的时候,需要指定宽度,高度,位深度和打包模式,并用冒号分割。设置的数值不一定要完全精确,系统会自动匹配最接近的数值,另外位深度和打包模式是可设置的(默认为12和P,表示打包).例如:
--viewfinder-mode // 指定传感器模式,以 <width>:<height>:<bit-depth>:<packing> 表示
- 该选项与 --mode 选项完全相同,不同之处在于它只适用于剧照捕捉的预览阶段(libcamera-hello 应用程序也使用该选项)。
- 低分辨率图像设置
--lores-width
--lores-height
- libcamera 允许从摄像机系统向应用程序传输第二个较低分辨率的图像流。在预览和视频模式下(即 libcamera-hello、libcamera-still和libcamera-vid)该图像流均可用,除其他外,还可用于图像分析。对于静态捕捉,低分辨率图像流不可用。
- 低分辨率图像流的视场角与其他图像流相同。如果为低分辨率流指定了不同的宽高比,那么这些图像将被压缩,像素不再是正方形。
- 在视频录制(libcamera-vid)过程中,如果设置了低分辨率,会禁用掉颜色去噪处理等功能。例如:
libcamera-hello --lores-width 224 --lores-height 224
- 注意,低分辨率设置通常要结合图像后处理使用,否则效用不大。
- 翻转图像
--hflip        #水平翻转图像
--vflip        #垂直翻转图像
--rotation     #根据给出的角度,水平或者垂直翻转图像
- --rotation的参数目前只支持0 和180, 其实就是相当于--hflip和--vflip.。例如:
libcamera-hello --vflip --hflip
- 裁剪图像
--roi #裁剪图像<x, y, w, h>
- --roi允许用户从传感器提供的完整图像中根据坐标裁剪自己想要的图像区域,也就是数字缩放,注意坐标值要是在有效范围的。 比如 --roi 0, 0, 1, 1就是无效的指令。
- 示例:示例指令会从图像中心裁剪1/4图像出来。
libcamera-hello --roi 0.25,0.25,0.5,0.5
- HDR 模式运行
--hdr
- --hdr选项会使摄像头以HDR(高动态范围)模式运行。该选项仅适用于某些受支持的摄像头,包括Raspberry Pi Camera Module 3系列.例如:
libcamera-still --hdr -o hdr.jpg 捕捉静态图像,
libcamera-vid --hdr -o hdr.h264 捕捉视频。
- 使用 HDR 选项通常会导致不同的相机模式,这可以通过比较 libcamera-hello --list-cameras 和 libcamera-hello --hdr --list-cameras 的输出来检查。
- 用户也可以提供 --hdr 0 或 --hdr 1,前者禁用 HDR 模式(相当于完全省略该选项),后者则与单独使用 --hdr 相同。
- 注:对于 Raspberry Pi 摄像头模块 3,非 HDR 模式包括通常的全分辨率(1200 万像素)模式及其等效的半分辨率 2x2 分档(300 万像素)模式。在 HDR 模式下,只有一个半分辨率(300 万像素)模式可用,而且在不重启相机应用程序的情况下,无法在 HDR 和非 HDR 模式之间切换
摄像头控制
以下选项会影响图像处理和控制算法,从而影响摄像机的图像质量。
- 设置图像的锐度
--sharpness <number>
- 通过<number>数值调整图像的锐度。 如果设置为0,就是不应用锐化。 如果设置的值超过1.0,会使用额外的锐化。例如:
libcamera-still -o test.jpg --sharpness 2.0
- 设置图像对比度
--contrast <number>
- 通过<number> 调整图像对比度。数值为 0 时,对比度最小;数值为 1.0 时,使用默认的对比度;数值大于 1.0 时,使用额外的对比度。例如:
libcamera-still -o test.jpg --contrast 1.5
- 设置图像亮度
--brightness <number>
- 通过<number>调整图像亮度,设置范围是-1.0 ~ 1.0。数值-1.0会产生(几乎)黑色图像,数值1.0会产生几乎全白的图像,数值0.0会产生标准图像亮度。例如:
libcamera-still -o test.jpg --brightness 0.2
- 注意,亮度参数会增加(或减少)输出图像中所有像素的偏移量。通常使用--ev选项更为合适。
- 设置图像色彩饱和度
--saturation <number>
- 通过<number>调整色彩饱和度。数值为0时会生成灰度图像,数值为1.0时会使用默认的色彩饱和度,数值大于1.0时会应用额外的色彩饱和度。例如:
libcamera-still -o test.jpg --saturation 0.8
- 设置EV补偿
--ev <number>
- 通过<number>设置图像的EV补偿,以光圈为单位,单位为光圈,范围为 -10至10。默认值为0。它的工作原理是提高或降低 AEC/AGC算法试图匹配的目标值。例如:
libcamera-still -o test.jpg --ev 0.3
- 设置曝光时间
--shutter <number>
- 注:如果相机的帧率太快,可能会导致无法按照设定的快门时间工作,如果遇到这种情况,可以尝试用--framerate来降低帧速率。
libcamera-hello --shutter 30000
- 设置增益值
--gain <number> #设置增益值(数值增益和模拟增益组合)
--analoggain    #模拟增益 --gain的代名词
- --analoggain和--gain实际上是完全相同的,设置了将使用的模拟和数字增益,使用analoggain只是为了兼容raspicam的程序。如果传感器驱动程序可以提供所需的增益,那么将只使用模拟增益。一旦模拟增益达到最大允许值,超出部分将作为数字增益提供。
- 注意:在某些情况下,即使没有超过模拟增益限制,数字增益也可能超过1。这种情况可能发生在:
- 任一色彩增益低于1.0,都会导致数字增益稳定在1.0/min(red_gain,blue_gain)。这意味着应用于任何色彩通道的总数字增益都不会低于1.0,因为这会导致色彩失真。
- 当 AEC/AGC 发生变化时,数字增益可能会略有不同,但这种影响应该只是短暂的。
- 设置测光模式
--metering <string>
- 设置AEC/AGC算法的测光模式, 可用的参数有:
centre - 中心测光 (默认)
spot   -点测光
averag -平均或者全幅测光
custom -自定义测光模式, 可以通过调谐文件设置
- 有关定义自定义测光模式以及如何在现有测光模式中调整区域权重的详细信息,请参阅Raspberry Pi 相机和 libcamera 的调整指南
- 示例:
libcamera-still -o test.jpg --metering spot
- 设置曝光配置文件
--exposure <string>
- 曝光模式可以设置为normal或者sport. 这两种模式的报告配置文件不会影响图像的整体曝光,但是如果是sport模式的话,程序会缩短曝光时间和提高正义来达到同样的曝光效果。
- 曝光配置文件可在相机调校文件中编辑。有关详情,请参阅Raspberry Pi 相机和 libcamera 的调校指南
- 示例:
libcamera-still -o test.jpg --exposure sport
- 设置白平衡模式
--awb <string>
- 可用的白平衡模式:
模式	        色温
auto	        2500K ~ 8000K
incadescent	2500K ~ 3000K
tungsten	3000K ~3500K
fluorescent	4000K ~ 4700K
indoor	        3000K ~ 5000K
daylight	5500K ~ 6500 K
cloudy	        7000K ~ 8500K
custom	        自定义范围, 通过调谐文件设置
- 注意:这些值只是近似值,可能会根据摄像机的调整而有所不同。
- 有关 AWB 模式以及如何定义自定义模式的更多信息,请参阅Raspberry Pi 摄像头和 libcamera 的调整指南
- 示例:
libamera-still -o test.jpg --awb tungsten
- 设置固定的颜色增益
--awbgains <number,number>
- 通过<number>来设置红色和蓝色增益值,并直接使用它们来代替 AWB 算法。在此设置非零值会禁用 AWB 计算。
- 示例:
libcamera-still -o test.jpg --awbgains 1.5, 2.0
- 设置去噪模式
--denoise <string>
- 支持的去噪模式:
auto -默认模式, 使用标准空间去噪, 如果是视频,会使用快速色彩降噪,拍摄静态图片的时候会使用高质量的色彩降噪。预览图像不会使用任何色彩去噪
off - 关闭空间去噪和色彩去噪
cdn_off -关闭色彩去噪
cdn_fast - 使用快速色彩去噪
cdn_hq - 使用高质量色彩去噪,不适用于视频录制。
- 注意,即使使用快速彩色去噪也会导致帧频降低。高质量的色彩去噪通常会导致更低的帧频。
- 示例:
libcamera-vid -o test.h264 --denoise cdn_off
- 指定摄像头调谐文件
--tuning-file <string>
- 这标识了应使用的 JSON 格式调整文件的名称。调整文件涵盖图像处理的许多方面,包括 AEC/AGC、AWB、色彩阴影校正、色彩处理、去噪等。
- 关于更多调谐文件的说明, 可以参考官方教程
- 示例:
libcamera-hello --tuning-file ~/my~camera-tuning.json
- 设置自动对焦模式
--autofocus-mode <string>
- 设置自动对焦模式,可以选择以下模式:
default    -默认情况下,摄像头会凯子连续自动对焦模式,除非设置了--lens-position 或者 --autofocus-on-capture 手动对焦的方式
manual     -手动对焦模式,可以通过--lens-position来设置对焦位置
auto       -只有在开启摄像头的时候会做一次对焦,其他情况下不调整对焦。(如果使用的是libcamera-still指令,只有使用--autofocus-on-capture情况下,会在拍照前做一次对焦)
continuous -摄像头会根据场景变化,自动调整对焦位置
- 此选项仅支持某些相机模块(如:Raspberry Pi Camera Module 3系列)
- 设置自动对焦范围
--autofocus-range <string>
- 设置自动对焦范围,可以选择以下:
normal --默认项, 从最近到无穷远
macro  -微距模式,只对近处的物体对焦。
full   -全距离模式,对最近物体调整到无穷远
- 此选项仅支持某些相机模块(如:Raspberry Pi Camera Module 3系列)
- 设置对焦速度
--autofocus-speed <string>
- 设置对焦速度,可以选择以下:
normal -默认项,正常速度
fast -快速对焦模式
- 此选项仅支持某些相机模块(如:Raspberry Pi Camera Module 3系列)
- 显示自动对焦窗口
--autofocus-window
- 显示自动对焦窗口,格式为 x,y,width,height,其中坐标以整个图像的比例给出。例如,--autofocus-window 0.25,0.25,0.5,0.5 将选择一个窗口,该窗口在每个维度上都是输出图像大小的一半,并以中间为中心。
- 默认值会导致算法在两个维度上都使用输出图像的中间三分之一(即图像总面积的 1/9)。
- 此选项仅支持某些相机模块(如:Raspberry Pi Camera Module 3系列)
- 设置对焦位置
--lens-position <string>
- 将镜头移动到固定焦距,一般用屈光度(单位为1 /米距离)给出。例如:
0.0              --设置对焦位置为无穷远
Any other number --设置对焦位置为 1/number number是你设置的任意数值, 比如,如果设置2, 表示会对焦到0.5m的位置
default          -- 对焦到镜头超焦距相对于的默认位置
- 注意,镜头只能进行近似校准,不同相机模块之间很可能存在差异。
- 此选项仅支持某些相机模块(如:Raspberry Pi Camera Module 3系列)
输出文件选项
- 输出文件名
--output -o
- 设置输出图像或者视频的文件名。 除了设置文件名之外,还可以指定输出的udp或者tcp服务器地址,从而将图像输出到服务器上。 有兴趣的可以查看后续tcp和udp的相关设置说明。
- 示例:
libcamera-vid -t 100000 --segment 10000 -o chunk%04d.h264
- 记录一个 100 秒的文件,每段 10 秒,每个文件命名为 chunk.h264,但包含一个递增计数器。请注意,%04d 会将计数写入字符串,但会通过添加前导零填充到至少 4 个字符的总宽度。
libcamera-vid -t 0 --inline -o udp://192.168.1.13:5000
- 将H.264视频流传输到端口 5000 上的网络地址 192.168.1.13
- 输出文件计数器
--wrap <number>
- 当输出到带有递增计数器(如输出文件名中的 %d)的文件时,当计数器达到该值时,将其归零。
- 示例:
libcamera-vid -t 0 --codec mjpeg --segment 1 --wrap 100 -o image%d.jpg
- 马上刷新输出文件
--flush
- --flush会将每一帧图像写入的同时都马上更新到硬盘中,降低延迟。而不是等待系统刷新。
- 示例:
libcamera-vid -t 10000 --flush -o test.h264
后期处理
- 后处理文件(post-process-file)选项指定了一个 JSON 文件,用于配置成像管道在相机图像到达应用程序之前对其进行的后处理。可以将其视为传统 raspicam "图像效果 "的替代。
- 后处理是一个大课题,需要使用 OpenCV 和 TensorFlowLite 等第三方软件来分析和处理图像。更多信息,请参阅后处理部分。
- 示例:
libcamera-hello --post-process-file negate.json
静态图片拍摄设置参数
--qiality, -q  #设置JPEG图像质量 <0 ~ 100>
--exif, -x #添加而外的EXIF标志
--timelapse  #延时拍照的时间间隔, 单位是ms
--framestart #帧计数的开始数值
--datetime  #用日期格式命名输出文件
--timestamp #用系统时间戳命名输出文件
-- restart  #设置JPEG重启时间间隔
--keypress, -k  # 设置回车按键拍照模式
--signal, -s  #设置信号触发拍照
--thumb #设置缩略图参数 <w:h:q>
--ebcoding, -e  #设置图像编码类型。 jpg / png / bmp / rgb / yuv420
--raw, -r  #保存原始图像
--latest #关联符号到最新保存的文件
--autofocus-on-capture  #设置在拍照前做一次对焦动作
静态图片拍摄设置参数
--quality, -q  # 设置JPEG指令 <0 - 100>
--bitrate, -b  # 设置H.264比特率
--intra, -g #设置内部帧周期 (只支持H.264)
--profile #设置H.264配置
--level  #设置H.264等级
--codec  #设置编码类型 h264 / mjpeg / yuv420
--keypress, -k  #设置回车暂停和录制
--signal, -s #设置信号暂停和录制
--initial #在录制或者暂停状态下启动程序
--split #切割视频并保存到另外的文件
--segment #将视频分割成多个视频段
--circular  #将视频写入循环缓冲区中
--inline #在每个I帧中写入数据头(只支持H.264)
--listen #等待TCP连接
--frames #设置录制的帧数
Buster系统
拍照
终端执行以下语句即可拍照:
raspistill -o image.jpg
此处 image.jpg 是照片文件名。
摄像
终端执行以下语句即可摄像:
raspivid -o video.h264 -t 10000
其中 -t 10000 表示录制 10 秒,用户各根据自己的需要进行调整。
参考资料
Python 代码控制摄像头
- 可借助picamera库,使python支持摄像头的控制
- 树莓派镜像在Bullseye版本之后,底层的树莓派驱动由Raspicam切换成libcamera。libcamera是一个开源的软件栈(后面会称呼做驱动,方便理解),方便于第三方移植和开发自己的摄像头驱动。当前的libcamera不支持python, 因此树莓派官方还是提供了Raspicam的安装下载的方法。对于切换成libcamera困难,但是又需要用最新系统的用户,请直接移步到Raspicam的使用说明。
预览
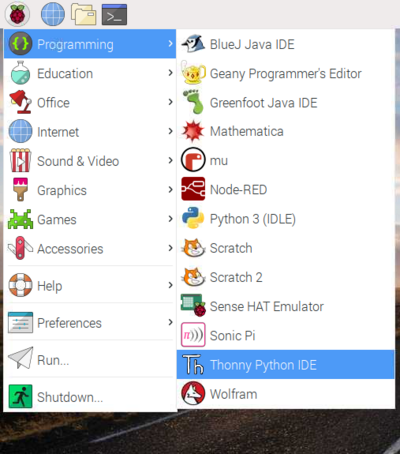
- 打开python IDE,如Thonny Python IDE,或打开记事本
- 新建名字为camera.py的python文件,并保存到桌面
- 输入以下代码
from picamera import PiCamera
from time import sleep

camera = PiCamera()

camera.start_preview()
sleep(5)
camera.stop_preview()
- 进入终端,执行
python3 Desktop/camera.py
桌面将弹出预览框,实时取景并预览
需要注意的是,预览框仅在直接连接屏幕时有效,而是使用VNC等软件远程连接树莓派桌面,则不会弹出该预览框
如果预览画面是上下颠倒的,则可以通过以下代码旋转180度
camera = PiCamera()
camera.rotation = 180
- 预览画面可旋转90度、180度、270度
- 如果要重置画面,可将画面旋转0度
设置预览框的透明度
camera.start_preview(alpha=100)
alpha的值范围是0-255
拍照
- 在预览代码的中间插入camera.capture()命令
camera.start_preview()
sleep(5)
camera.capture('/home/pi/Desktop/image.jpg')
camera.stop_preview()
请注意:必须要执行代码sleep(5),以便给摄像头的传感器留下一定时间调整亮度和白平衡
录像
移除 camera.captue(),并加入camera.start_recording()和camera.stop_recording()
camera.start_preview()
camera.start_recording('/home/pi/Desktop/video.h264')
sleep(5)
camera.stop_recording()
camera.stop_preview()
以上代码执行后,将在桌面生成video.h264的视频,长度为5秒
更多参数
- picamera可以给图片添加很多参数
设置分辨率
- 默认情况下,图片的分辨率等于显示器的分辨率,但最大的图像尺寸不超过2592*1944像素,视频尺寸不超过1920*1080像素;图像和视频的最小尺寸则为64*64像素
- 可使用以下代码设置图像的分辨率
camera.resolution = (2592, 1944)
camera.framerate = 15
camera.start_preview()
sleep(5)
camera.capture('/home/pi/Desktop/max.jpg')
camera.stop_preview()
- 请注意,相机的帧数需设置为≤15帧,以支持最大分辨率
给图片加文字
添加文字
camera.start_preview()
camera.annotate_text = "Hello world!"
sleep(5)
camera.capture('/home/pi/Desktop/text.jpg')
camera.stop_preview()
文字大小
camera.annotate_text_size = 50
annotate_text_size的取值范围为6-160,默认值32
文字颜色
camera.start_preview()
camera.annotate_background = Color('blue')
camera.annotate_foreground = Color('yellow')
camera.annotate_text = " Hello world "
sleep(5)
camera.stop_preview()
修改图片的参数
- 亮度
camera.start_preview()
camera.brightness = 70
sleep(5)
camera.capture('/home/pi/Desktop/bright.jpg')
camera.stop_preview()
brightness的取值范围为0-100,默认值50
- 对比度
camera.contrast = 50
contrast的取值范围为0-100,默认值50
- 风格
可通过camera.image_effect,给图片添加特效
有效值:
- none(默认)
- negative
- solarize
- sketch
- denoise
- emboss
- oilpaint
- hatch
- gpen
- pastel
- watercolor
- film
- blur
- saturation
- colorswap
- washedout
- posterise
- colorpoint
- colorbalance
- cartoon
- deinterlace1
- deinterlace2
例如
camera.start_preview()
camera.image_effect = 'colorswap'
sleep(5)
camera.capture('/home/pi/Desktop/colorswap.jpg')
camera.stop_preview()
- 模式
可使用camera.exposure_mode,设置拍照模式(如夜晚、运动、雪地等模式)
有效值:
- off
- auto(默认)
- night
- nightpreview
- backlight
- spotlight
- sports
- snow
- beach
- verylong
- fixedfps
- antishake
- fireworks
例如
camera.start_preview()
camera.exposure_mode = 'beach'
sleep(5)
camera.capture('/home/pi/Desktop/beach.jpg')
camera.stop_preview()
- 白平衡
可使用camera.awb_mode设置白平衡
有效值:
- off
- auto(默认)
- sunlight
- cloudy
- shade
- tungsten
- fluorescent
- incandescent
- flash
- horizon
例如设置白平衡为“白天”
camera.start_preview()
camera.awb_mode = 'sunlight'
sleep(5)
camera.capture('/home/pi/Desktop/sunlight.jpg')
camera.stop_preview()
