使用PCF8591对C8051F进行AD转换
<tbody></tbody>
使用PCF8591对C8051F进行AD转换。
| |
|---|---|
<tbody></tbody>
| |
<tbody></tbody>
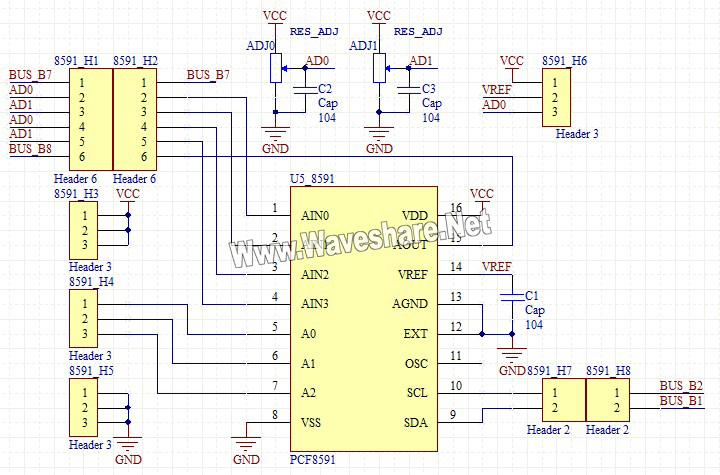
下面部分从TXT拷出,拷到网页,代码部分缺省了很多空格,比较凌乱,请谅解! I2C(SMBus)详细程序请查看<a class="Blue_2_12px_" href="https://wiki.diustou.com/article/C8051F-4-3-4.htm" style="color: rgb(7, 66, 184);" target="_blank">C8051F I2C(SMBus)程序 。 //目标系统: 基于C8051F单片机 //应用软件: Silicon IDE / Keil /*01010101010101010101010101010101010101010101010101010101010101010101 实验内容: 利用PCF8591进行AD数据转换,转换的值返回到P2口中,P2口与LED相连,观测LED灯是否正确显示 硬件连接: 将P2口与8位LED指示灯相连。 在PCF8591的AIN0端口接入一个10K的电位器 DVK501(PCF8591PrlPort) F320 EX VCC --------- VCC GND --------- GND SDA --------- P1.0 SCL --------- P1.1 注意事项: (1)若有加载库程序,请将光盘根目录下的“library”下的“C8051F”文件夹拷到D盘 (2)请详细阅读:光盘根目录下的“说明书首页.htm”里的相应产品说明 10101010101010101010101010101010101010101010101010101010101010101010*/
void main(void) { uchar *pGetDat,tmp = 0; PCA0MD &= ~0x40; // Clear watchdog timer enable clock_external(); // Set oscillator in external,the clock is 12M delay_ms(100); Check_SDA(); XBR1 = 0x40; // Enable crossbar and weak pull-ups SMBus_Init(); Enb_Interrupt(); while(1) { PCF8591_getAD(MODE0,CHNL0,pGetDat); if(*pGetDat != tmp) { showLine(11,1,lcd_buffer,"0x%x2",*pGetDat); refreshLCD(lcd_buffer); tmp = *pGetDat; P2 = tmp; } delay_ms(100); } }
//Channel1 = AIN1; //Channel2 = AIN2; //Channel3 = AIN3;
//Channel1 = AIN3-AIN1 //Channel2 = AIN3-AIN2;
//Channel1 = AIN1; //Channel2 = AIN3-AIN2;
//Channel1 = AIN3-AIN2;
void PCF8591_getAD(uchar mode,uchar chan,uchar *ADC) { SMBus_Write(0x90,mode|chan,0,1); SMBus_Read(0x91,ADC,1); } void PCF8591_setDA(uchar val) { SMBus_Write(0x90,DAouputEn,val,2); } | |
<tbody></tbody>
|
