Experiment 10: DS18B20 Temperature Sensor Experiment
From Diustou Wiki
Contents
Arduino
Experimental Phenomenon
- Print the detected temperature value via serial port.
Circuit Connection

Installing Libraries
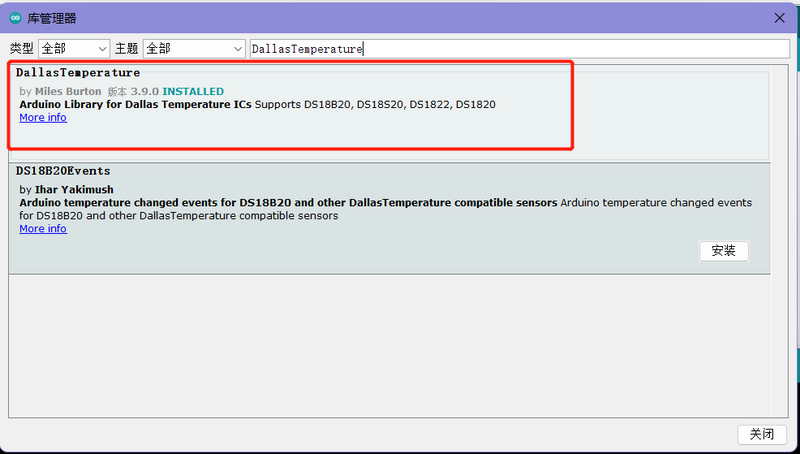
- Installing DallasTemperature
- Go to Tools -> Manage Libraries, search for DallasTemperature, and click Install.
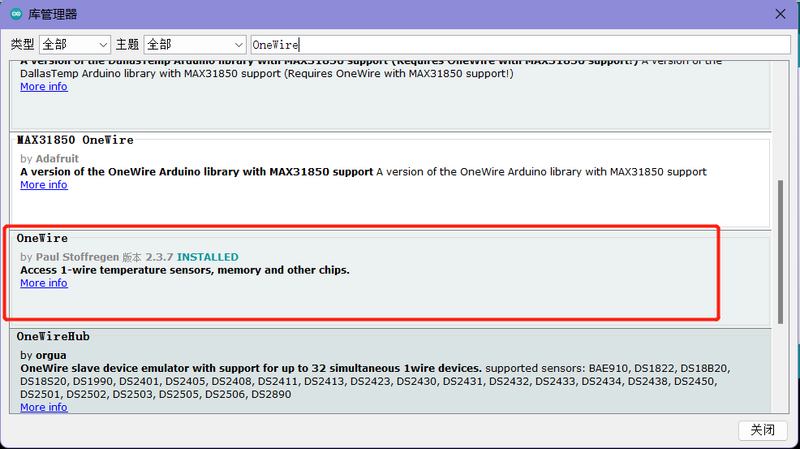
- Installing OneWire
- Go to Tools -> Manage Libraries, search for OneWire, and click Install.


Reference Program
#include <OneWire.h>
#include <DallasTemperature.h>

#define ONE_WIRE_BUS 2
OneWire oneWire(ONE_WIRE_BUS);
DallasTemperature sensors(&oneWire);

void setup(void)
{
  Serial.begin(9600);
  Serial.println("Dallas Temperature IC Control Library Demo");

  sensors.begin();
}

void loop(void)
{
  Serial.print(" Requesting temperatures...");
  sensors.requestTemperatures();
  Serial.println("DONE");

  Serial.print("Temperature for Device 1 is: ");
  Serial.print(sensors.getTempCByIndex(0));

  delay(500);
}
Raspberry Pi
Circuit Connection

Program Execution
Python
- Install the gpiozero library
- You can install the library using the following commands:
sudo apt update
sudo apt install python3-gpiozero
- For other systems on Raspberry Pi, you can install the library using the following command:
sudo pip3 install gpiozero
- Run the following command to view the GPIO pin definitions on the Raspberry Pi:
pinout
- Related Configuration
- Enable the 1-Wire bus
sudo raspi-config
Select Interfaces oOptions -> 1-Wire -> Would you like the one-wire interface to be enabled? Select Yes -> “The one-wire interface is enabled” Select Yes -> Select finish
- Restart the Raspberry Pi system
sudo reboot
- Install device drivers and verify if the device is working
sudo modprobe w1-gpio
sudo modprobe w1-therm
cd /sys/bus/w1/devices/
ls
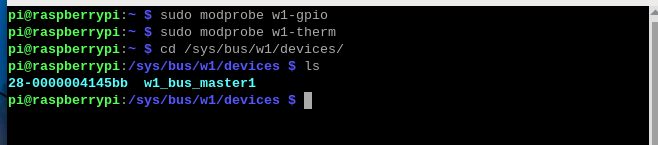
- 28-0000004145bb is the serial number of an external temperature sensor device, but it may vary for each device. The serial number of the DS18B20 temperature sensor is unique.
- Note: Remember the device serial number as it needs to be modified accordingly in the program.
- Check the current temperature

cd 28-0000004145bb
ls
- View device data

cat w1_slave

- The second line t=24437 represents the current temperature value. To convert it to Celsius, divide by 1000, so the current temperature = 24437/1000 = 24.44°C.

- Download the Raspberry Pi reference example, unzip the file, and copy it to the user directory.
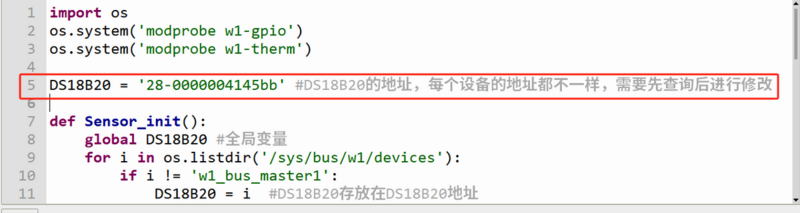
- Modify the project file: Open the corresponding file raspberrypi/10/python_gpiozero/sensor.py
- Change the fifth line DS18B20 = '28-0000004145bb' to the device address queried above, and then save the file.
- Run
- Modify the project file: Open the corresponding file raspberrypi/10/python_gpiozero/sensor.py

cd raspberrypi/10/python_gpiozero
python sensor.py
- You will see the Raspberry Pi correctly running the DS18B20 program, continuously printing the detected temperature values. To exit, press ctrl+C.
- For more commands, please refer to the gpiozero documentation