Experiment 31: LCD1602 Parallel Control Experiment
Contents
Display Principle
In digital circuits, all data is stored as 0s and 1s. By performing different data operations on the LCD controller, different results can be obtained. For displaying English characters, since there are relatively few English letters, only 8 bits (one byte) are needed. For Chinese characters, however, there are over 6000 commonly used ones. Therefore, in the ASCII table, the high 128 less frequently used values are used in pairs to represent Chinese characters, which are the internal codes for Chinese characters. The remaining low 128 positions are reserved for English characters, which are the internal codes for English characters. So, after obtaining the internal code for a Chinese character, it is still just a set of numbers. How is it displayed on the screen? This involves the character font bitmap. Although the font bitmap is also a set of numbers, its meaning has fundamentally changed from that of numbers. It uses the individual bits of the numbers to record the shape of English or Chinese characters. For example, the way the English letter 'A' is recorded in the font bitmap is shown in Figure 1.

And the Chinese character "你" (you) is recorded in the font bitmap as shown in Figure 2.

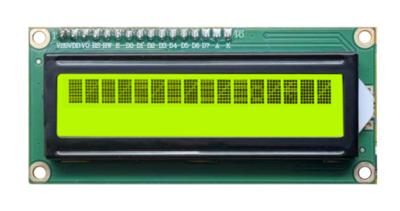
Module Description
Contrast Adjustment
- The contrast can be adjusted by connecting a potentiometer to the VO pin. Specifically:
- When the contrast is at its maximum, the display is as follows:
- When the contrast is at its minimum, the display is as follows:
- When the contrast is at its maximum, the display is as follows:
- When the potentiometer is adjusted to an appropriate position, the display is as follows:
- Check if the wiring is loose.
- Check if the initialization program is correct.


Backlight Options
- The backlight can be controlled by whether the A and K pins are connected to VCC and GND.
- When pin A is connected to VCC and pin K is connected to GND, the backlight is on:
- When pin A is disconnected from VCC or pin K is disconnected from GND, the backlight is off:
- When pin A is connected to VCC and pin K is connected to GND, the backlight is on:


Arduino
Experimental Phenomenon
- When the LCD1602 is first powered on, it displays "Welcome to use!".
- The first line of the LCD1602 displays "Hello, Diustou!".
- The second line of the LCD1602 scrolls to display "Hello, Diustou!".
Partial Function Descriptions
- LiquidCrystal() – Constructor
- Content: Creates an instance of the LiquidCrystal class. Can use 4 or 8 data lines (please note that command lines are also required). If using the 4-line method, leave D0-D3 unconnected, and the RW pin can be grounded without connecting to an Arduino pin; if connected this way, omit the rw parameter in the function.
- Syntax:
- LiquidCrystal(rs, enable, d4, d5, d6, d7)
- LiquidCrystal(rs, rw, enable, d4, d5, d6, d7)
- LiquidCrystal(rs, enable, d0, d1, d2, d3, d4, d5, d6, d7)
- LiquidCrystal(rs, rw, enable, d0, d1, d2, d3, d4, d5, d6, d7)
- Parameters:
- rs: The Arduino pin number connected to rs.
- rw: The Arduino pin number connected to rw.
- enable: The Arduino pin number connected to enable.
- d0, d1, d2, d3, d4, d5, d6, d7: The Arduino pin numbers connected to these pins.
- begin() – Specify Display Size
- Content: Specifies the size of the display (width and height).
- Statement: lcd.begin(cols, rows)
- Parameters:
- lcd: The variable name for the LCD type.
- cols: The number of columns the display can show (16 for 1602).
- rows: The number of rows the display can show (2 for 1602).
- clear() – Clear the Screen and Move the Cursor to the Top Left Corner
- Description: Clears the content on the LCD screen and moves the cursor to the top left corner.
- Syntax: lcd.clear()
- home() – Move the Cursor to the Top Left Corner (Without Clearing the Screen)
- Content: Positions the cursor at the top left corner of the screen. That is, subsequent characters will be displayed starting from the top left corner of the screen. If you also want to clear the content on the screen, use the clear() function instead.
- Syntax: lcd.home()
- setCursor() – Move the Cursor to a Specified Position
- Description: Positions the cursor at a specific location.
- Syntax: lcd.setCursor(col, row)
- Parameters:
- lcd: The variable name for the LCD type.
- col: The column where you want to display the cursor (starting from 0).
- row: The row where you want to display the cursor (starting from 0).
- write() – Display a Character (at the Cursor Position)
- Description: Writes a character to the LCD.
- Syntax: lcd.write(data)
- Parameters:
- lcd: An object of the LiquidCrystal class.
- data: The character you want to display (limited to English letters, numbers, and custom characters).
- print() – Display a String
- Content: Displays text on the LCD.
- Syntax:
- lcd.print(data)
- lcd.print(data, BASE)
- Parameters:
- lcd: The variable name for the LCD type.
- data: The data to be displayed, which can be of type char, byte, int, long, or string.
- BASE (optional): The number base (optional), with BIN, DEC, OCT, HEX displaying numbers in binary, decimal, octal, and hexadecimal formats, respectively.
Circuit Connection

Reference Program
  int i = 0;
  lcd.setCursor(1,0);             // Set the cursor position for the LCD to start displaying
  lcd.print("Hello,Diustou!");   // Display "Hello, Diustou!" on the LCD
  for(i=16;i >=0;i--)
  {
    lcd.setCursor(i,1);
    lcd.print("Hello,Diustou!");     // Display the integer value of the temperature on the LCD
    delay(1000);
  }
  lcd.clear();                    // Clear the LCD screen